Crops and Bleed
Why they are necessary.
In printing terminology, bleed is image or colour that goes beyond the edge of where the sheet will be trimmed. In other words, the bleed is the area that will be trimmed off. This gives the us a small amount of space to allow for movement of the paper, and trimming accuracy. After trimming, the bleed ensures that no unprinted edges occur in the final trimmed document.
We are unable print exactly to the edge of a sheet, so to achieve this, it is necessary to print a slightly larger area than is needed and then trim the sheet down to the required finished size. Images, background images and fills which are intended to extend to the edge of the page must be extended beyond the trim line to give a bleed. Print your artwork right to the edge of the paper using the proper setup option in Adobe InDesign. Set up bleed when you create your document. To print to the paper’s edge without any margins around your design, first extend your design into a bleed area so it’s slightly larger than your finished print size. The excess will be trimmed off after it’s printed, and your design will cover the entire page.
How to add bleed and export to PDF with crops and bleed.
If you know your design will extend to the paper’s edge, you should set up the bleed area right when you create your document. Ideally you will be using Adobe InDesign or Illustrator. In the new document window expand bleed and slug and use .125" or 3mm in the bleed settings on all sides. Extend your background colours and images to the bleed guides.
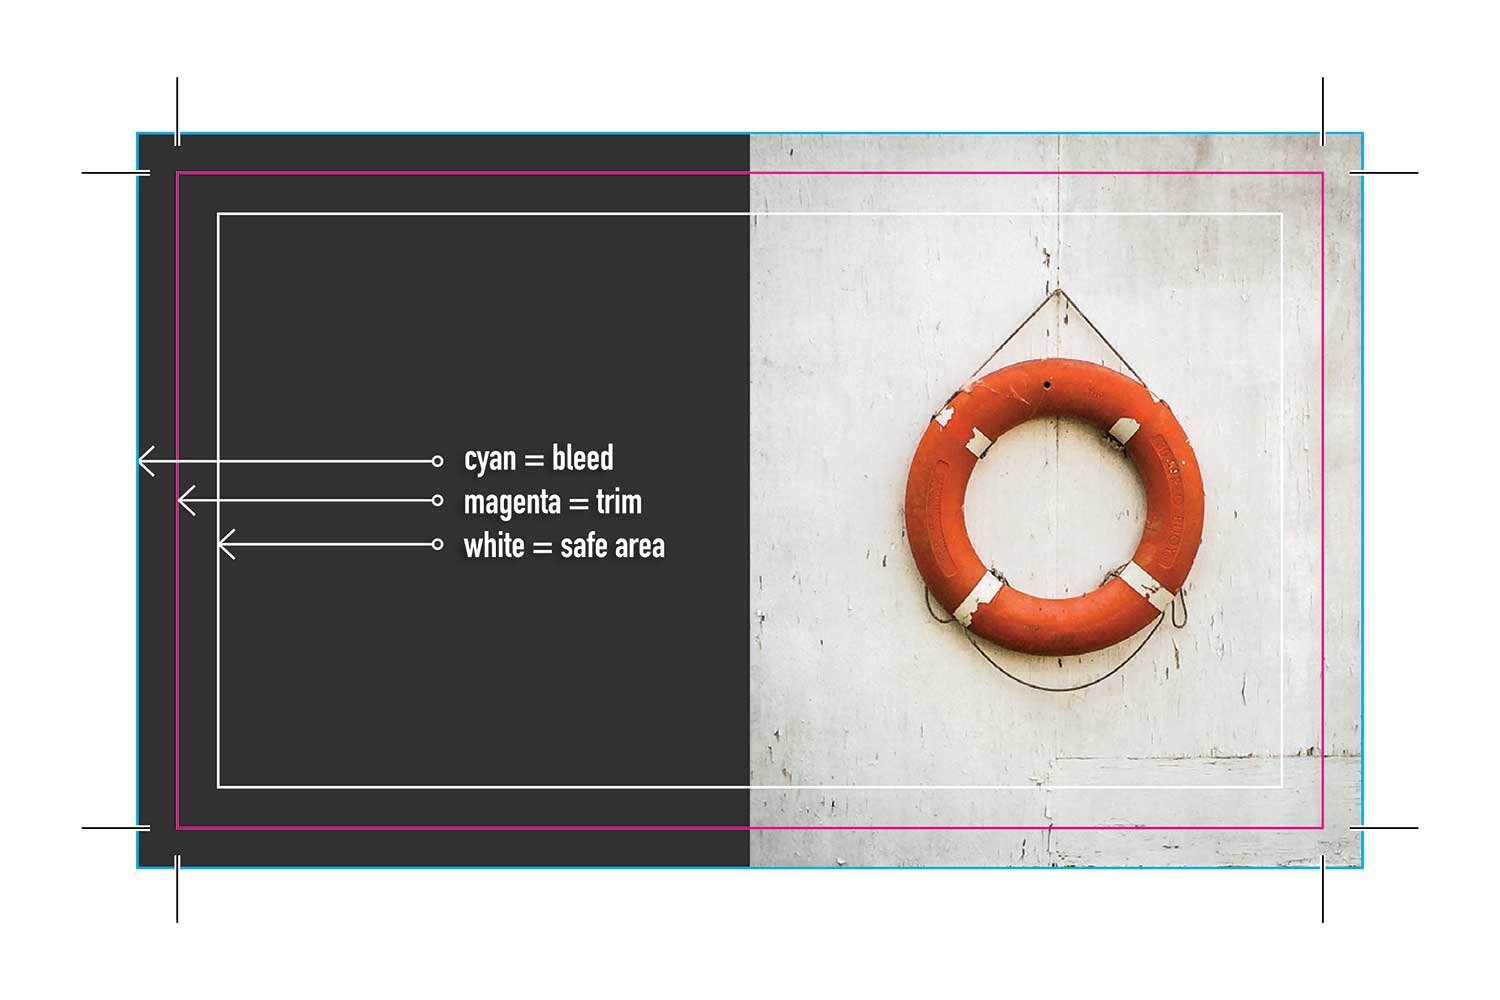
After your document is complete Choose File > Export and select the Adobe PDF (Print) format. Select an Adobe PDF preset, generally PDF/X-1a. In Marks and Bleeds, select Crop Marks and Use Document Bleed Settings. Click Export and review the PDF. It should look something like this with the background extending beyond the crop marks.