Bleeds and Crops in Canva: Tips and Tricks
More and more of our clients are creating their own artworks using Canva and many times we receive the print ready files without bleeds and crops. So in this post we will go over how to add crops and bleeds on your Canva artwork.
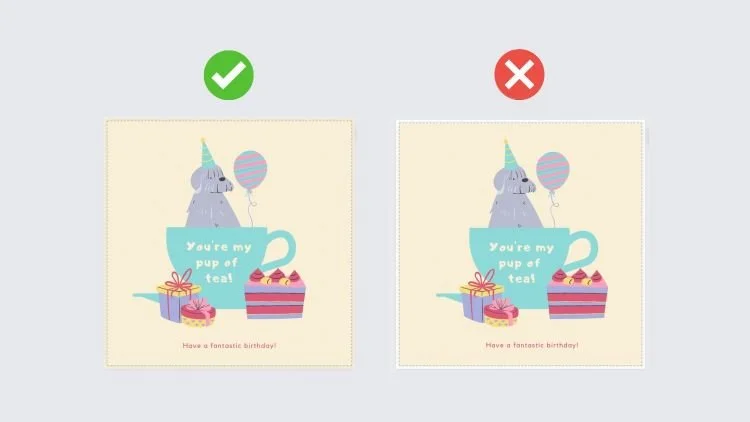
Essentially the designer just needs to make sure that your design extends slightly beyond the edge of the page. This will ensure that there are no white borders when the design is printed and trimmed. When using Canva you can follow the following steps to make sure your files are print-ready!
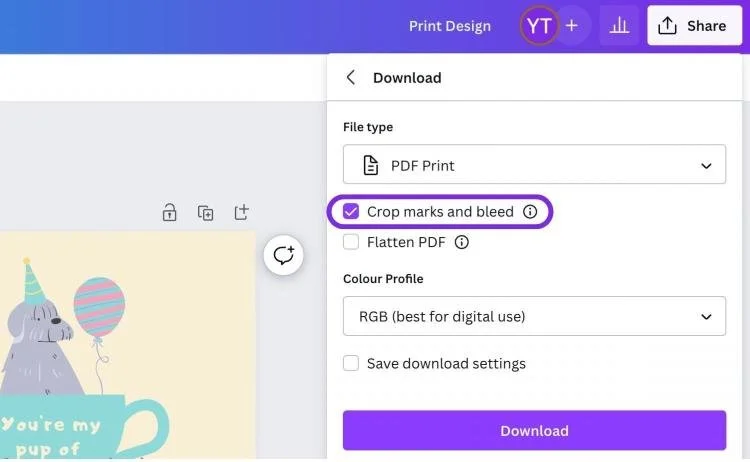
After adding bleeds, make sure everything looks as intended. Double-check that your important content is within the safe zone and that the bleed area extends beyond the trim edge. Once you're satisfied with your design, click on the "Download" button and select your preferred file type (e.g., PDF or JPG) with the "Crop marks and bleed" option enabled. Your crop marks will be added automatically.
Congratulations! You've successfully added bleeds and crops to your design in Canva. Now you can confidently send your design off for printing, knowing that it's properly prepared for professional results.
In conclusion, adding bleeds and crops to your designs in Canva is a crucial step in ensuring that your printed materials look polished and professional.